CLICK HERE IF YOU ARE HAVING TROUBLE VIEWING VIDEO!
Do you have questions on your 3/16" Corner Punch? Is it working the way you had hoped? If you're having trouble achieving the results you want, watch this helpful training video! I hope these tips and tricks will help you better utilize your 3/16" Corner Punch!
Punches are a quick and easy way to add interest, dimension, and color to your cards, tags, and scrapbook pages. You can glue punched shapes directly onto your projects or layer a sheet of card stock that has been punched over a coordinating card stock for a reverse effect.
Using the 3/16th Inch Corner Punch will add a lovely finishing touch to your card projects and scrapbook pages.
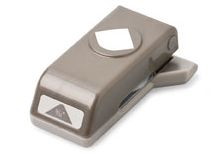
 3/16th Inch Corner Punch
Item 119871
Price $6.95
Order yours today by clicking the link above!
Have a Blessed Day!!
Do you have questions on your 3/16" Corner Punch? Is it working the way you had hoped? If you're having trouble achieving the results you want, watch this helpful training video! I hope these tips and tricks will help you better utilize your 3/16" Corner Punch!
Punches are a quick and easy way to add interest, dimension, and color to your cards, tags, and scrapbook pages. You can glue punched shapes directly onto your projects or layer a sheet of card stock that has been punched over a coordinating card stock for a reverse effect.
Using the 3/16th Inch Corner Punch will add a lovely finishing touch to your card projects and scrapbook pages.
Item 119871
Price $6.95
Order yours today by clicking the link above!
Have a Blessed Day!!

Katie Burke
Stampin' Up!® Independent Demonstrator
Pine Mountain / LaGrange, Georgia
Inspire. Create. Share.
Click HERE to place your online order 24/7!
"Like" me on Facebook by clicking HERE. Exclusive offers!
Visit My Demo Service Site - I Blog For Demos!
Visit My Demo Service Site - I Blog For Demos!